Your wishlist is empty.
Secure Payment
30 days return

You've found the right canvas, measured the wall, and then noticed the plaster is already showing scars from earlier attempts. A direct nail may hold a small frame, but it gives you little flexibility and can create a weak point around valuable artwork. A properly installed picture rail gives you a controlled suspension system, provided the rail, fasteners, hooks, cords, and frame hardware are treated as one structural chain.
The attractive part is easy to see. You can shift artwork horizontally, alter the hanging height, and refresh a display without repeatedly drilling into the wall. The less visible part matters more: the wall behind the molding determines whether the system remains secure. This guide focuses on both sides of the job, from historic plaster protection to the practical limits of drywall, studs, hooks, and heavy canvas frames.
A homeowner with an old plaster wall often discovers the problem after the first rearrangement. One nail hole becomes several, a repair patch catches the light, and the next frame needs to sit somewhere slightly different. Picture rail hanging changes that routine because the permanent fixing stays in the molding while the artwork moves through hooks and cord.
The method has deep roots. One history of picture rail molding traces the idea to the 15th century, when rails helped hang tapestries and heavy textiles without damaging plaster. The approach later became especially common in Georgian, Victorian, and Edwardian interiors, and remained familiar in many homes built through the 1920s and 1930s. Before the 1940s, hooks and cord were a common way to display paintings, prints, mirrors, and photographs on lath-and-plaster walls.
Practical rule: Treat the rail as permanent infrastructure and the hooks as adjustable display hardware.
That distinction explains why the system still suits historic homes, galleries, rentals, and hospitality interiors. You can change a seasonal arrangement, move a large canvas away from a doorway, or rebalance a reception display without leaving a new line of holes behind. It doesn't make the wall completely damage-free, because installing the rail still requires secure fixings, but it concentrates the intervention in one planned band.
Picture rail is particularly useful when the display changes often. A renter may want to avoid repeated repairs. A restaurant may rotate artwork around furniture and lighting. A hotel or office may need to refresh a corridor without sending a maintenance team around to patch every previous fastening point.
It also helps when a wall has difficult construction. Direct nails are a poor answer for fragile plaster, while a well-supported rail spreads the installation across multiple fixing points. The rail won't rescue a weak substrate or an overloaded hook, but it gives you more control than treating every frame as an isolated wall fixing.
For broader placement guidance, this guide to hanging wall art is useful when you're planning frame position, balance, and viewing height. For smaller rooms, browse small-apartment wall art with the rail position and available drop already in mind.
A picture rail is only as dependable as its attachment. Decorative molding fixed into weak plaster or unsupported drywall may look correct on installation day and still loosen once the suspension load starts pulling outward.
Set the top or center of the rail approximately 12 to 18 inches below the ceiling, following the surrounding trim and the profile of the room. That range comes from practical installation guidance at HGTV's picture rail installation guide. Existing crown molding, door casings, and ceiling irregularities may influence the final position, but don't let visual alignment replace a level reference.
Use a tape measure, pencil, long spirit level, or laser level. Mark stud positions before you cut the molding, then transfer those marks to the rail. On a long wall, don't trust the ceiling as a guide. Older ceilings can vary enough to make a rail look visibly crooked if you measure down from each end.
Cut the rail to suit the wall, and plan joints rather than forcing one long piece into place. Miter longer runs where appropriate, then leave caulk and filler until the rail is nailed and stable.
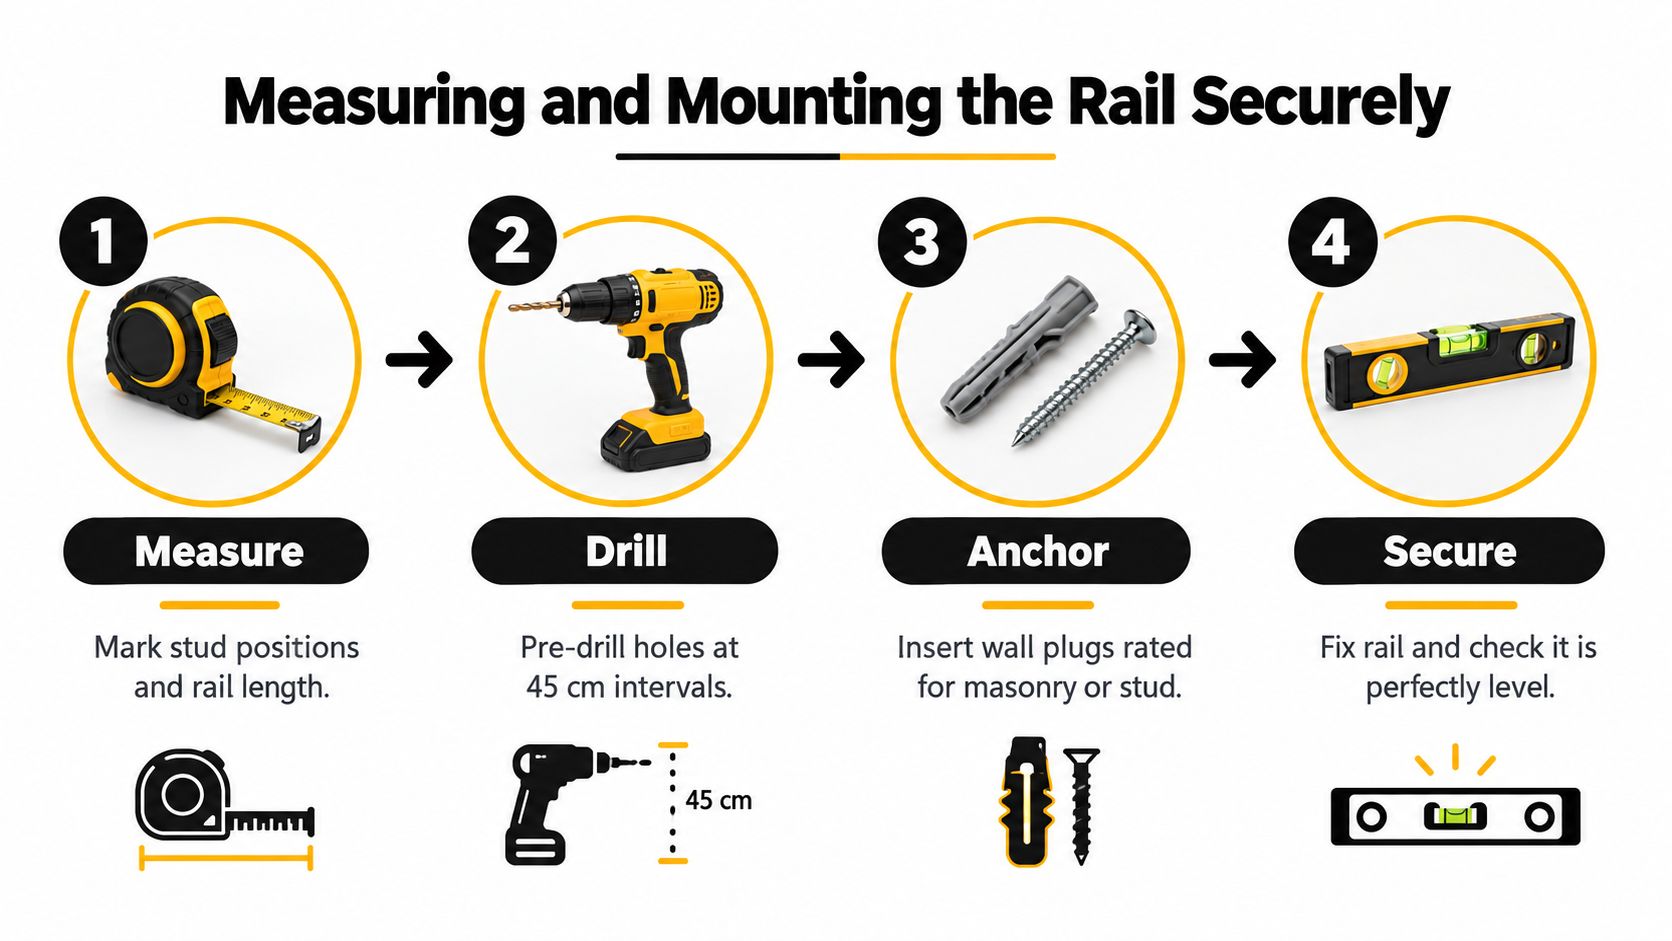
Apply construction adhesive and fasten the molding at approximately 6-inch intervals, using 2-1/2-inch nails, as outlined in the verified installation guidance from HGTV. Where possible, drive fixings into studs or solid backing. A stud connection gives the rail a dependable structural path, while a drywall-only fixing relies on the anchor holding inside a comparatively fragile sheet material.
For masonry, select plugs and screws designed for that substrate. For drywall-only stretches, use heavy-duty anchors rather than ordinary lightweight plugs. A wall mounting brackets guide can help when you're comparing bracket and fixing principles, but the fastener still needs to match your actual wall construction.
Leave the decorative finishing until the physical check is complete. Press upward along the rail and listen for flex, rattle, or movement. Test one section with a load slightly heavier than the artwork you plan to hang before trusting the installation with valuable canvas.
The video below provides a visual reference for the installation sequence.
For a staircase display, plan the rail and frame drops together rather than allowing each piece to land at a random angle. The staircase wall art collection can help you think through scale, but the rail itself must still follow a level or deliberately controlled line.
The rail profile is rarely the weakest component. The limiting factor is usually the weakest part of the chain, whether that's a drywall anchor, a hook, a cord, a D-ring, the molding attachment, or the wall behind the fixing.
A heavy canvas creates more than a simple downward load. The cord pulls down from the hook, while the frame can pull outward from the wall if the suspension angle is wrong. That combined force becomes more demanding when the wall connection is weak or when the frame swings in a draft.
The table below is a decision framework, not a universal load certificate. Actual capacity depends on the rail design, fixing condition, hook rating, frame hardware, and the manufacturer's instructions. The verified guidance specifically notes that load ratings vary widely and that some rail-hook systems are marketed around 20 kg or more when fixed correctly into studs or solid backing, while another hook may be rated at 25 lb, which becomes the effective ceiling for that setup. See the picture rail installation guidance and hooks-and-cord hardware guidance before selecting components.
| Wall substrate | Recommended fastener | Estimated max load per hook |
|---|---|---|
| Stud or solid timber backing | Rail fastened directly into the structure, with a hook rated for the artwork | Use the lowest manufacturer rating in the chain |
| Masonry or solid block | Masonry screw and suitable plug, selected for the substrate | Use the lowest manufacturer rating in the chain |
| Drywall with a stud behind the rail | Fasten through the rail into the stud | Use the hook and frame rating after confirming the stud connection |
| Drywall-only section | Heavy-duty toggle or molly anchor, with suitable rail attachment | Treat the anchor rating as the controlling limit |
| Fragile plaster or uncertain backing | Investigate the substrate before loading, or use a reinforced alternative | Don't assign a load until the attachment is verified |
The table intentionally avoids invented pound-per-hook figures. Hardware sellers publish different ratings, and those figures don't transfer safely from one wall type to another.
A rail can be the wrong solution for oversized, unusually deep, or very heavy framed prints when the wall cannot provide a solid fixing path. It may also be unsuitable where impact, vibration, or public access creates additional risk, such as busy hospitality areas, offices, clinics, or healthcare spaces.
Use two hooks for a wide frame when the hardware and rail support it. That spreads the hanging points and reduces rotation, but it doesn't double the safe capacity automatically. The lowest-rated component still governs the installation.
Once the rail is secure, the suspension should be assembled as carefully as the molding. The usual workflow is straightforward: seat the rail hook over the molding, attach the cord or wire to the lower curve, and connect the suspension to the frame's D-rings or approved hanging hardware.
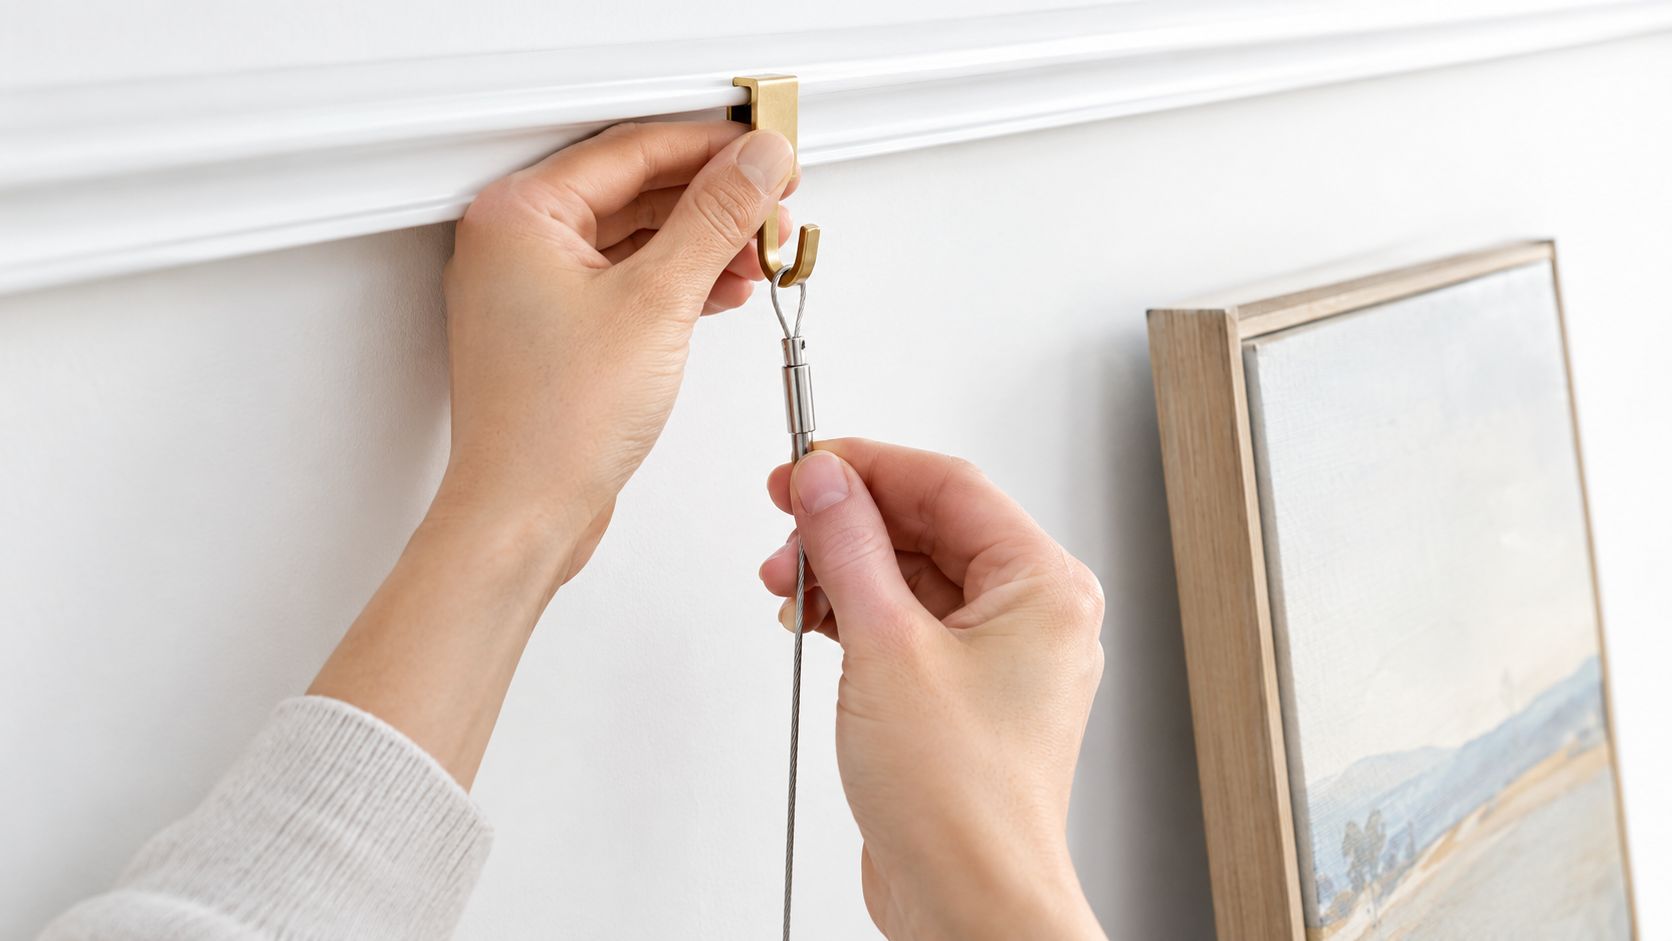
Fit the D-rings or equivalent hardware to the frame first, checking that the screws have a sound grip in the frame material. Attach the wire or cord so it can carry the intended load, then place the rail hook over the molding and connect the lower suspension loop.
For a wide canvas, use two suspension points. Two points reduce side-to-side rotation and help keep the frame balanced, particularly when the artwork has an uneven weight distribution. A single central point is simpler, but it can let a broad frame twist or tilt.
The suspension angle matters. Set the hooks and wire so the line hangs as vertically as possible instead of pulling the top of the frame away from the wall. Some installers use a slight downward hook angle of about 15 degrees to manage cable tension, but the hardware geometry and manufacturer's instructions take priority.
Don't choose the cord by appearance alone. Match the cord, hook, D-rings, and rail to the same load requirement.
A hook rated for 25 lb limits the system to that rating even if the cord and frame hardware can carry more, as explained in the verified displaying art with hooks and cord guidance. Check the connection after placing the canvas, then inspect it again after 24 hours for slippage or movement.
Drafts create another practical problem. A rail-hung frame can swing, shift sideways, or tip off a poorly seated hook, especially near doors, windows, children, or busy commercial circulation routes. Keep the frame stable, use appropriate anti-swing measures where suitable, and don't assume that a decorative cord makes a secure installation.
A picture rail gives you a useful design advantage because the wall fixing and the visible artwork no longer have to share the same position. Keep the rail visually consistent, then use cord length, frame scale, and horizontal spacing to build the composition below it.
Start with the largest canvas as the anchor. Place smaller pieces around its visual mass rather than creating an accidental row of equal rectangles. A matched color family can unify different subjects, while a deliberate contrast in frame finish or image style can make the arrangement feel collected rather than overly coordinated.
In a living room, a lower grouping can relate the artwork to a sofa, console, or fireplace. In a high-ceilinged room, longer drops can emphasize the vertical architecture and prevent the display from clinging to the rail. In a narrow hallway, keep projection and movement under control, because a frame that swings into the circulation path creates a practical problem as well as a visual one.
For a hospitality space, repeated frame sizes and consistent cord placement create order across a long wall. In a home office, a looser mix of canvas art and photographs can feel more personal. A bedroom generally benefits from fewer, calmer pieces, with enough wall area left open to keep the display from becoming visually heavy.
The arrangement doesn't need to be symmetrical. An off-center anchor can work when another object, such as a mirror, lamp, or furniture group, balances the visual weight elsewhere. The important distinction is between intentional asymmetry and a display that has no clear anchor.
For more visual references, these online art gallery success stories offer useful context for thinking about presentation and curation, not just individual pieces. You can also explore living room wall art while checking that each candidate's size, frame depth, and suspension hardware suit the rail.
Varying cord length creates layers, but don't let every frame hang at a different height without a reason. Align a group by center, bottom edge, or a shared visual horizon, then introduce one controlled variation to prevent the display from looking mechanical.
Jessie's Home is one option for ready-to-hang canvas wall art and gallery-quality photo prints, with collections organized by room, style, subject, and place. Whichever source you choose, confirm the finished frame weight and hardware before assigning it to the rail.
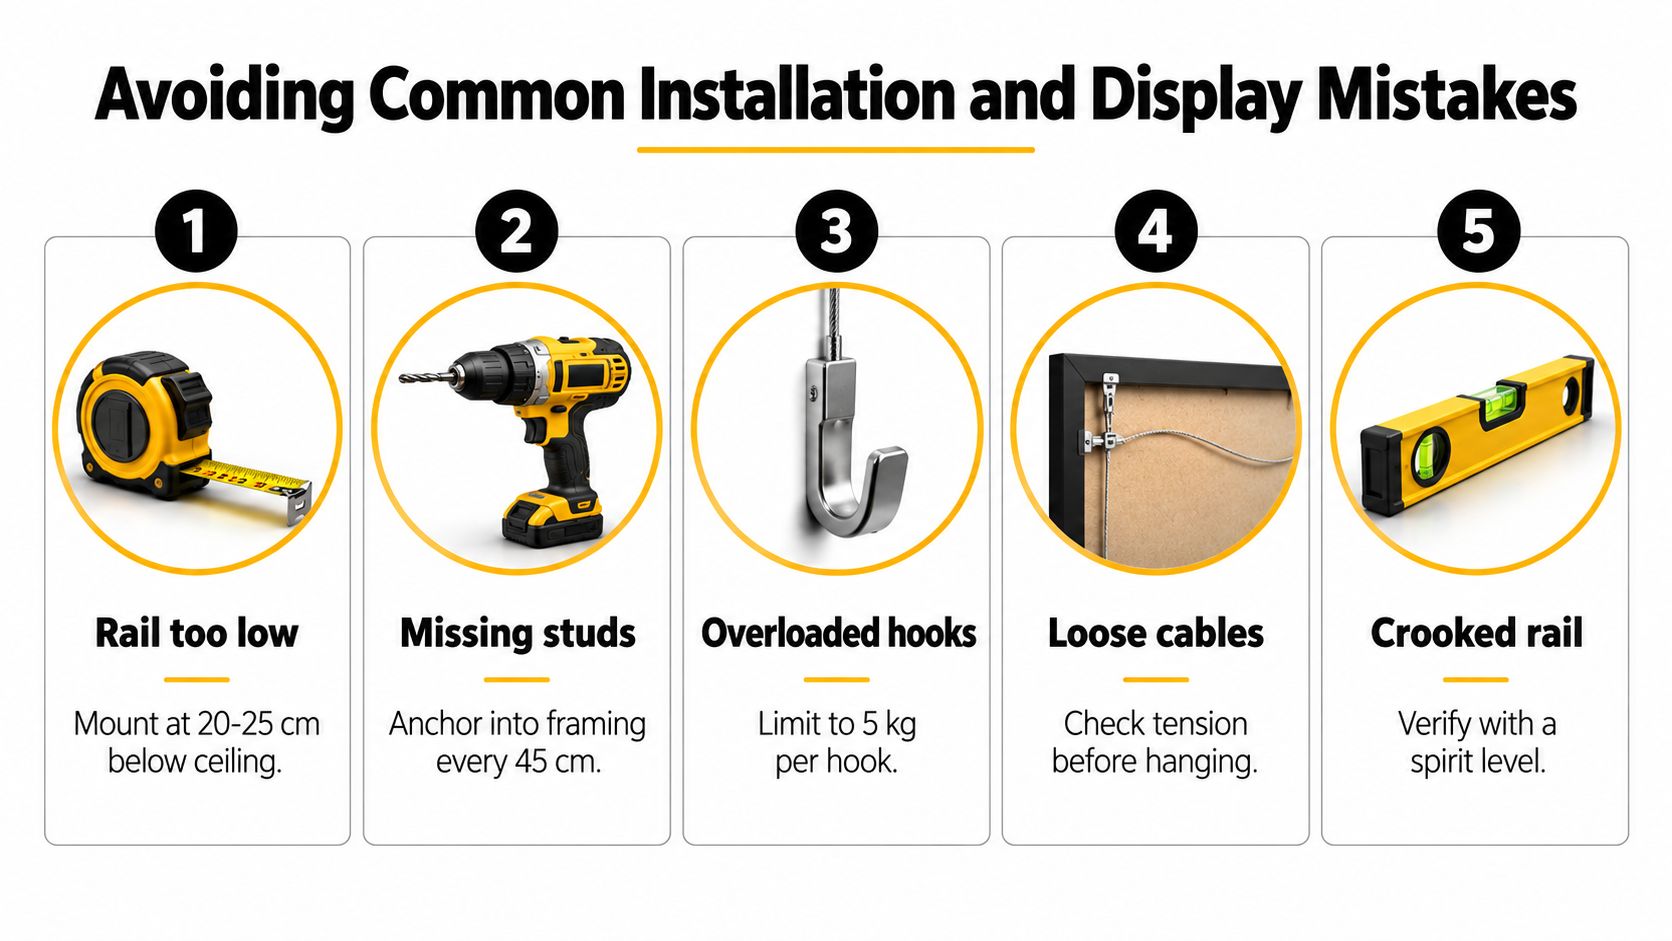
Picture rail isn't purely decorative trim. It carries a load through a sequence of components, and a small mistake at any point can loosen the wall attachment or send the frame out of balance.
The most common errors are predictable:
Drafts deserve particular attention. A frame that moves slightly beside a quiet wall may swing repeatedly near a door, window, fan, or busy walkway. That movement can increase the chance of the artwork tipping off the hook, so stabilize the display before you leave it unattended.
Don't load the rail immediately just because the adhesive and filler look dry. Let the fixing settle according to the adhesive and hardware instructions, then perform a physical check and test a section before hanging valuable art. If the wall flexes, the rail rattles, or the hook doesn't seat cleanly over the molding, stop and correct the structural issue rather than styling around it.
Jessie's Home offers artist-made canvas wall art and gallery-quality photo prints in styles ranging from abstract and scenic to botanical and minimalist, with pieces produced on canvas and hand-stretched over solid wood frames. Visit Jessie's Home to choose artwork that suits your room, then confirm the finished weight and select picture rail hardware that supports it safely.

Stylish game room wall decor ideas with real tips on themes, durable materials, lighting, and layouts. Practical advice for renters and homeowners.
Stylish game room wall decor ideas with real tips on themes, durable materials, lighting, and layouts. Practical advice for renters and homeowners.

Learn how to hang picture rail securely and style it perfectly. Get step-by-step installation tips, weight limits, and display ideas for your canvas art.
Learn how to hang picture rail securely and style it perfectly. Get step-by-step installation tips, weight limits, and display ideas for your canvas art.

Learn how to choose the right prints for bedroom walls — sizing, mood, framing, placement above the bed, and care tips. Practical guidance for every room.
Learn how to choose the right prints for bedroom walls — sizing, mood, framing, placement above the bed, and care tips. Practical guidance for every room.


