Your wishlist is empty.
Secure Payment
30 days return

A shoebox of 4x6 prints can sit untouched for years, even when the images are too good to stay hidden. Maybe a few are leaning against a bedside lamp, tucked behind books, or waiting in a drawer because they feel too small for a wall and too special for an album. That in-between status is exactly what makes 4x6 art prints useful. They're not failed large artworks or leftover snapshots. They're compact styling pieces that can bring color, memory, and rhythm to shelves, desks, narrow walls, and flexible gallery arrangements.
The format also solves a practical problem. A larger piece can dominate a small room, while a tiny print can disappear unless you give it structure. With the right frame, mat, spacing, and grouping, a 4x6 print becomes an intentional part of the room rather than an afterthought.
A narrow shelf, crowded desk, or small hallway often needs a finishing detail rather than a dominant artwork. A 4x6 art print fits that role well. It adds color, memory, or pattern without taking over the furniture around it, and its compact size makes it easy to move as the room changes.
The format has a practical foundation. Its 3:2 aspect ratio matches the proportion associated with 35mm film and many modern camera sensors, so correctly prepared images usually need little or no cropping. Kodak standardized 35mm film in 1934, and its 24x36 mm frame established a proportion that scaled naturally to 4x6 inches. The size is also commonly expressed as 102x152 mm, which helps explain its familiarity across photo-finishing systems. PetaPixel's overview of 4x6 photo dimensions traces how the format moved from everyday photo processing into a broad household standard.
That history translates into useful room-fit. A 4x6 print suits a narrow picture ledge, fits many ready-made frames, and can sit beside objects that a larger artwork would overwhelm. Above a kitchen desk, one vertical botanical print can soften the area without competing with shelves, lighting, or notes. In a bathroom corner, a small framed image finishes the wall while preserving an open feeling.
The format works best when the print has a clear job. One image can provide a quiet accent on a nightstand. Several can create rhythm along a hallway shelf or across a modular gallery. The question is whether the surrounding arrangement gives the print enough context.
Use one when:
A collection of small works also gives you more control than one dominant statement. You can layer pieces on a shelf, change the order of a desk grouping, or refresh a room without rebuilding the entire display. That flexibility suits renters, frequent redecorators, and spaces where art should support the atmosphere rather than control it.
Practical rule: Treat a 4x6 print as a modular styling unit. Its strength comes from placement, framing, and its relationship to nearby pieces.
The format remains convenient for albums, gift prints, and everyday orders because it aligns with common photo-processing equipment. That convenience makes it a low-commitment way to add personality to overlooked spaces while keeping a collection easy to rearrange.
Small prints look polished when the frame is chosen around the artwork, not pulled from a discount bin. Start with the paper, then decide how much of it you want visible.
Confirm that the image area is 4x6 inches, or approximately 10.2x15.2 cm, and check whether the paper includes a white border. A bordered print can sit inside a frame with the full paper edge visible, while a full-bleed print may look better with a mat that defines the image window.
Measure both the outer paper and the printed image. If the print has a border, don't trim it automatically. That margin may be part of the composition, especially with fine art photography, deckled edges, or illustrations designed to breathe.
A mat creates visual space between a small image and a larger frame. For a balanced portrait presentation, a 2-inch top and side border with a slightly heavier 2.5-inch bottom border can keep the print from looking low or crowded. Pre-cut openings commonly range from 3.5x5 to 4x6, so check whether the opening reveals the full image or covers part of the outer edge.
A 4-ply mat board is a practical everyday choice. An 8-ply mat gives the print a deeper, more substantial reveal and can suit a formal study, hallway, or collection of heirloom-style images. For traditional livestock or ranch-inspired interiors, the framing principles used in heirloom quality cattle wall art can help you think about mat color, wood tone, and visual permanence without making a small print feel overdecorated.
Frame depth affects how finished the piece feels. A depth between 0.75 and 1.25 inches gives most small framed prints enough presence on a shelf or wall. Spacers are useful when the artwork shouldn't touch the glass, particularly with textured paper, raised media, or a print you want to protect from condensation and surface contact.
Skip conventional glass when the display needs to be lightweight or frequently rearranged. Acrylic face mounts can work in contemporary settings, while an open-back shadow box suits thicker paper, layered objects, or a print displayed with a small keepsake.
For ready-made frames, look for:
If you're already comparing small prints with larger decorative pieces, a browse through custom canvas wall art can help clarify when a compact framed work is the right choice and when a room needs more scale.
| Print Size | Mat Opening | Mat Border | Finished Frame Size | Best Room Use |
|---|---|---|---|---|
| 4x6 | 3.5x5 | Moderate reveal | 8x10 | Desk, bedside table, small shelf |
| 4x6 | 4x6 | Minimal border | 6x8 | Compact wall grouping or ledge |
| 4x6 | 3.5x5 | Wider balanced border | 11x14 | Hallway, study, layered gallery |
| 4x6 | 4x6 | Deep presentation mat | 12x16 | Formal collection or accent wall |
A small print may sit on a desk or shelf, but viewers usually see it from close range. Soft lettering, blurred eyes, fine branches, and weak architectural lines become noticeable quickly, so file preparation matters as much as the display arrangement.
For a standard 4x6 print, the established target is 300 PPI, or 1,200x1,800 pixels. The print-preparation guidance from 4by6 explains why a 300 PPI workflow supports sharper results for close-viewed prints. If the file is smaller, enlargement may produce a usable image, but it cannot recreate texture the original capture never recorded.
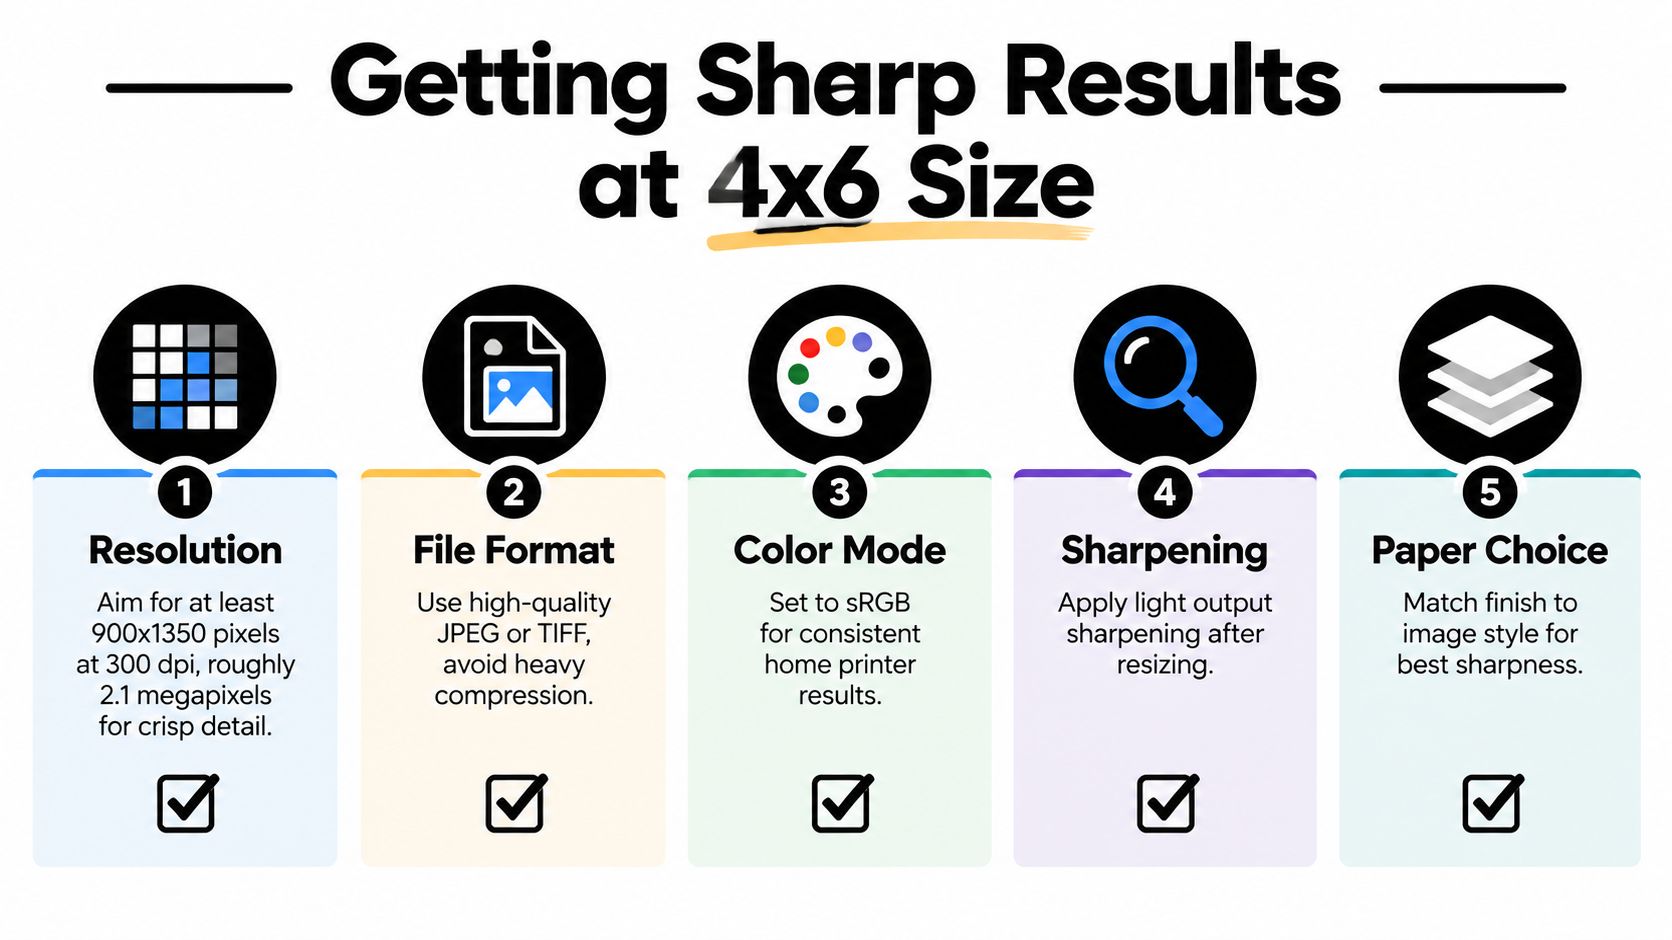
Keep faces, eyes, logos, signatures, and other important details away from the trim. A safe margin of at least 0.125 inches is a practical production habit, particularly for full-bleed artwork. File Studio's print-preparation guide recommends checking dimensions after cropping and keeping critical content clear of the edge.
Bleed applies when the image reaches the paper edge. Build the file at 4.25x6.25 inches, with 0.125 inches of bleed on every side, or approximately 1,275x1,875 pixels at 300 PPI. That extra area allows slight trimming movement without exposing a thin white strip.
Before uploading, check:
If exposure or color correction is unfamiliar, restrained editing is safer than aggressive sharpening or saturation. For photographic artwork that may later occupy more wall space, photography canvas wall art offers a useful reference for how the same image changes when its scale and surface change. That comparison helps decide whether a crisp 4x6 belongs in a compact grouping or should be prepared for a larger feature piece.
A 4x6 print becomes much more convincing when several pieces share a measured structure. The key is to decide whether you want order, movement, or a combination of small prints with larger anchors.
A grid of 9 prints with 1.5-inch spacing creates a compact block that works well in a hallway, beside a doorway, or above a slim console. Use identical frames and consistent orientation if the room leans symmetrical. The repeated edges make the group read as one artwork rather than a collection of unrelated snapshots.
Keep the outer boundary even. If one frame sits too high or the spacing changes halfway across, the small format will make the error more visible.
In a living room, combine 4x6 prints with larger 8x10 and 11x14 anchors. The small pieces can carry color or detail around the larger works, while the anchors stop the arrangement from feeling visually weightless. This layout suits relaxed interiors because the composition can be balanced without being perfectly mirrored.
Choose one dominant frame color, then allow the artwork to vary. Black frames create a crisp outline, natural wood adds warmth, and white frames can keep a bright room from feeling heavy.
A staircase already provides a directional line, so a diagonal sequence can follow the rise naturally. Keep the 4x6 frames aligned to the same visual path, then adjust the distance between pieces according to the stair geometry. This takes more measuring than a grid, but the result feels integrated rather than placed randomly along the wall.
Set the central anchor of a display around 57 to 60 inches from the floor, adjusting for furniture, stair height, and the people who use the room. Create paper templates for every frame and arrange them on the floor first. Tape the templates to the wall before making holes, then step back from several viewing points.
| Layout | Room Fit | Spacing | Best For |
|---|---|---|---|
| Tight grid | Narrow hallway or compact wall | 1.5 inches | Symmetrical interiors and repeated imagery |
| Salon mix | Living room or study | Varied but intentional | Collected rooms with larger anchor pieces |
| Stair-step diagonal | Stairwell or rising wall | Follows the slope | Directional movement and relaxed composition |
Use a level, measuring tape, pencil, painter's tape, and the right fasteners for the wall surface. Neasden Hardware's guide to tools for hanging pictures is useful when you're deciding between basic hooks, picture rail systems, and other hanging equipment.
For apartment rooms where nail holes are a concern, keep the grouping on a shelf or picture ledge. You'll get the same modular feeling with less commitment, and small apartment wall art can help you compare compact display ideas with pieces designed for more wall presence.
A 4x6 print doesn't need a picture hook to feel intentional. Its compact footprint makes it especially good for surfaces that already collect useful objects, provided the arrangement stays edited.
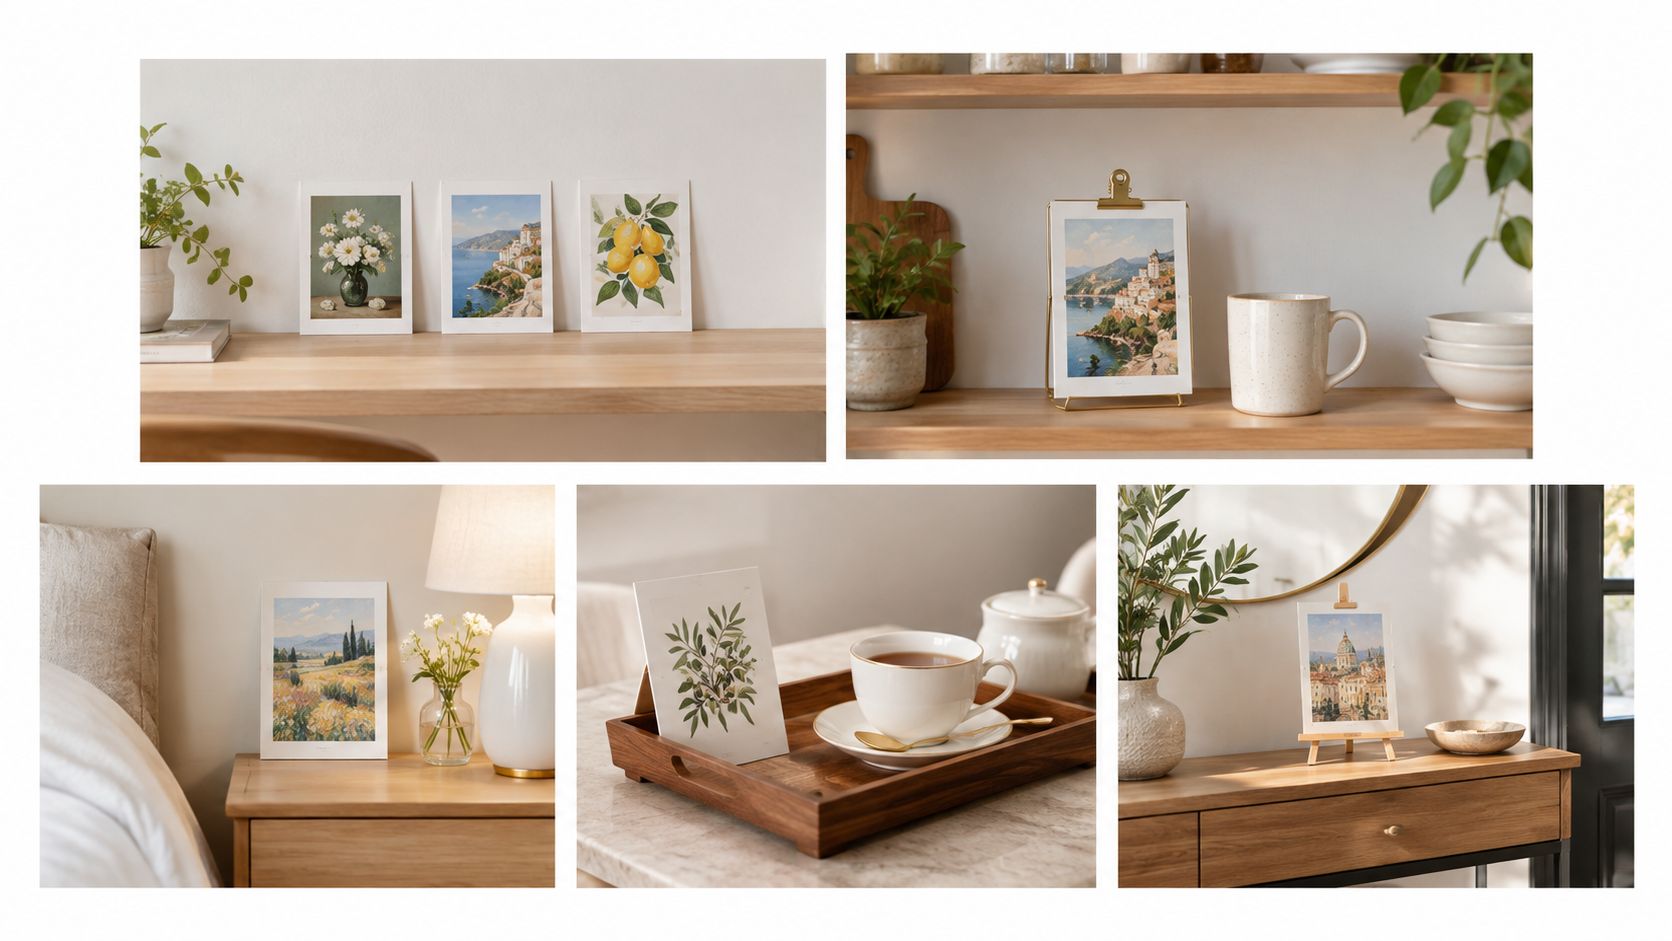
On a desk ledge, place three prints in slim acrylic easels. Mix one portrait orientation with two horizontal views, then rotate the center image monthly. The easels keep the paper away from the surface and let you change the display without bending corners or removing wall hardware.
Open kitchen shelving benefits from one strong image rather than a crowded row. Try a single 4x6 in a clip-on frame, positioned behind a small vase or beside a stack of cookbooks. A wire clip makes swapping easy, but keep it away from steam, splashes, and direct heat.
At a bedside table, a vertical print can act as a visual nightcap. Use a shallow mini ledge or weighted acrylic stand, and choose a calm image with enough negative space to remain restful beside a lamp, alarm clock, and book. The small scale keeps the surface functional.
Boutique hotels, guesthouses, and short-term rentals can use 4x6 prints as welcome cards or local visual references. A tabletop wire holder allows the card to be replaced between guests without damaging the paper, while a restrained botanical image adds character without permanent installation.
Gift sets work best when the prints feel related. Group three to five images in a kraft sleeve, keeping the orientation mix deliberate and the color palette connected. Add a rigid backing sheet so the prints don't bend in storage, and separate them with archival sleeves if the paper surface is delicate.
A small display is easy to refresh, but it still needs breathing room. Leave space around each print, avoid stacking too many patterns together, and use the holder as part of the design rather than hiding it. These choices let renters and small-space residents change a room in minutes without surrendering wall real estate.
The same approach works for offices, clinic reception areas, and hospitality tabletops. A few carefully chosen prints can make a practical surface feel considered, while the lightweight format keeps rearranging simple.
Here's a short visual guide for styling and arranging compact prints in lived-in rooms:
A 4x6 print on a shelf or desk often gets moved more than a large framed piece. It may slide in and out of a frame, shift during cleaning, or pass between hands when someone wants a closer look. Hold glossy prints by the edges. For a larger collection, cotton gloves help keep fingerprints and skin oils off the surface.
Dust the frame and glazing with a soft microfiber cloth every two to four weeks. Keep cleaning spray away from the frame opening. Liquid can wick under glass or acrylic and stain the paper, creating damage that is difficult to reverse.
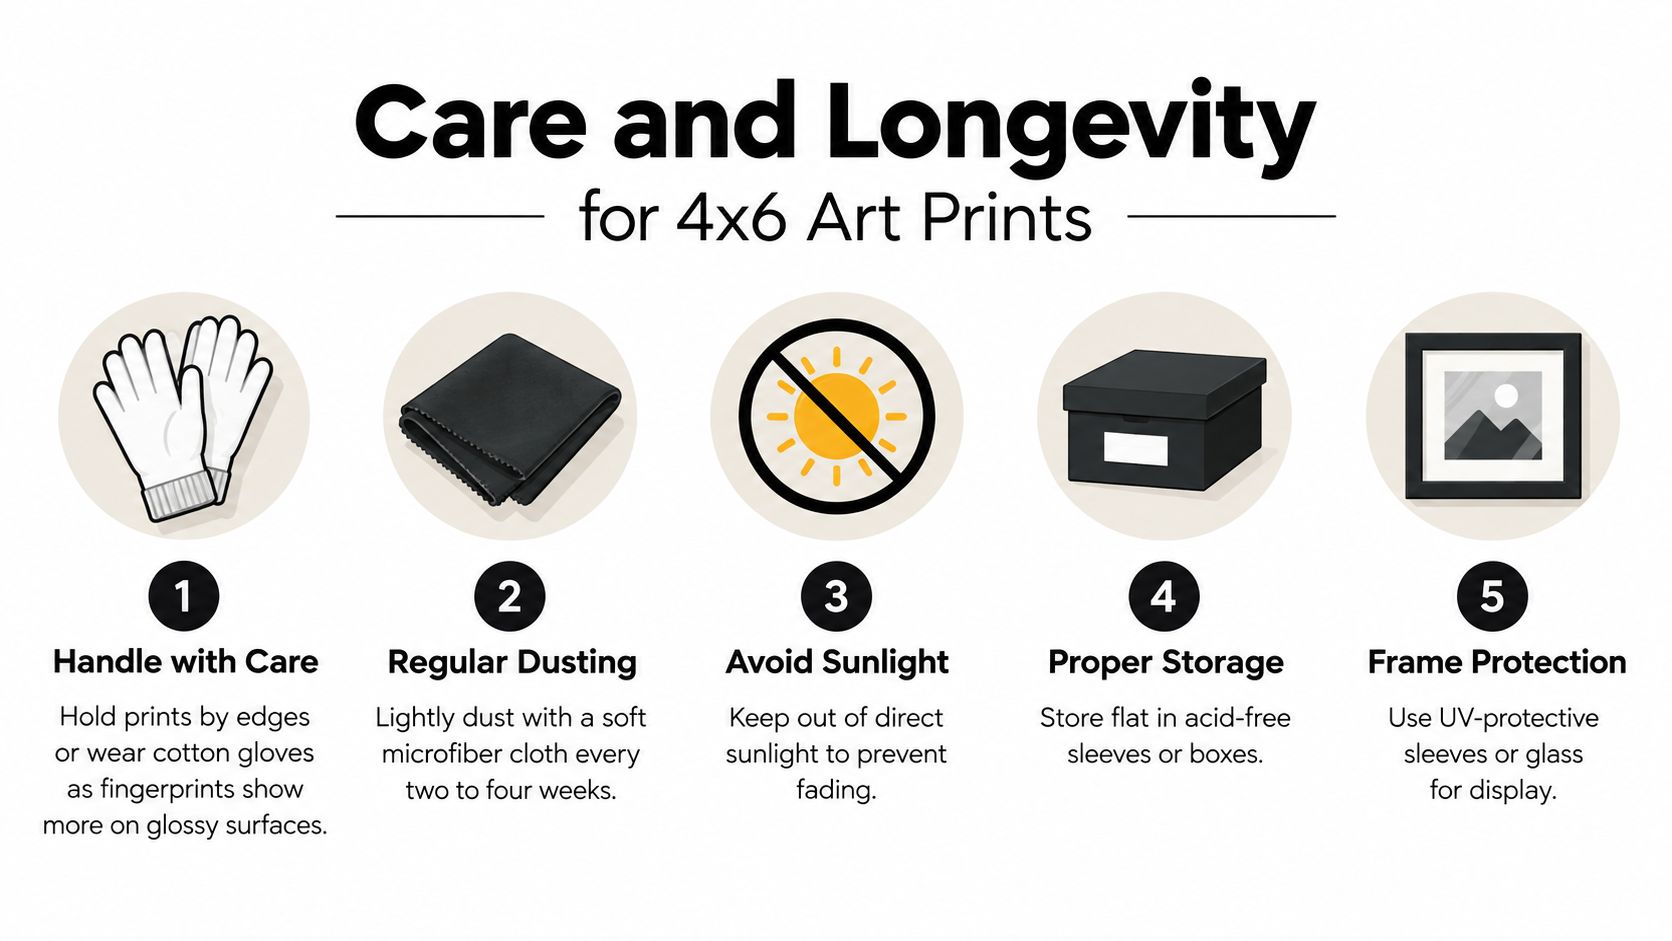
Direct sunlight fades displayed prints fastest. Dye ink may lose contrast within 2 to 5 years under direct sun, while pigment ink may retain color for 15 to 30 years. Treat these as typical guidance, not guarantees. Paper type, printer, exposure, and display conditions all affect the result.
UV-filtering glass or acrylic reduces exposure, and acid-free mat board separates the print from materials that can discolor it over time. For a sentimental image, choose a wall with indirect light. Protective glazing helps, but it does not make full sun a safe display location.
Store loose prints flat in archival sleeves or an archival box. Keep them below 75 percent humidity, away from attic heat, damp basements, radiators, and exterior walls prone to condensation. Avoid placing heavy objects on the sleeves, since pressure can crease corners or mark the paper.
Seasonal check: Inspect the frame seal, backing board, and glazing for gaps, yellowing, moisture spots, or a print that has shifted. Small corrections are easier before damage spreads.
When rotating a shelf, desk, or modular gallery arrangement, put each removed print into a clean sleeve immediately. Do not leave it face-down on a desk. This protects the image from dust, oils, and spills while preserving the flexibility that makes 4x6 prints useful for changing room groupings.
Explore Jessie's Home for artist-made canvas wall art and gallery-quality photography that can complement a small-print arrangement or provide a larger anchor when a room needs more presence. Browse by subject, room, or style, then choose a piece that gives your shelves, desks, and gallery walls a finished visual direction.

Discover how black and white minimalist art transforms any room with calm, contrast, and timeless style, plus tips on prints, framing, and placement.
Discover how black and white minimalist art transforms any room with calm, contrast, and timeless style, plus tips on prints, framing, and placement.

Discover watercolor abstract art techniques, learn how prints differ from originals, and get styling tips for your home. A complete guide for wall art lovers.
Discover watercolor abstract art techniques, learn how prints differ from originals, and get styling tips for your home. A complete guide for wall art lovers.

Explore the beauty of modern landscape art and how to choose prints that transform your home. From trends to room-by-room styling tips, this guide covers it
Explore the beauty of modern landscape art and how to choose prints that transform your home. From trends to room-by-room styling tips, this guide covers it


